The wow-factor for this card is on the inside... a box full of goodness that pops up when the card is opened. You can fill the box with images of whatever you think your recipient will like best. Cute kittens, flowers, candy canes, or in my case, a pug nosed pup! Just remember that your image needs to be no wider than the width of the box.
BOX TEMPLATE
1. Start with a standard card blank of any size and decorate the front as desired. I used patterned papers, a die cut sentiment and part of a cute little pug dog that will also appear inside my card. If you wish, you can also add patterned papers to the inside of the card to contrast with the little box.
INSIDE:
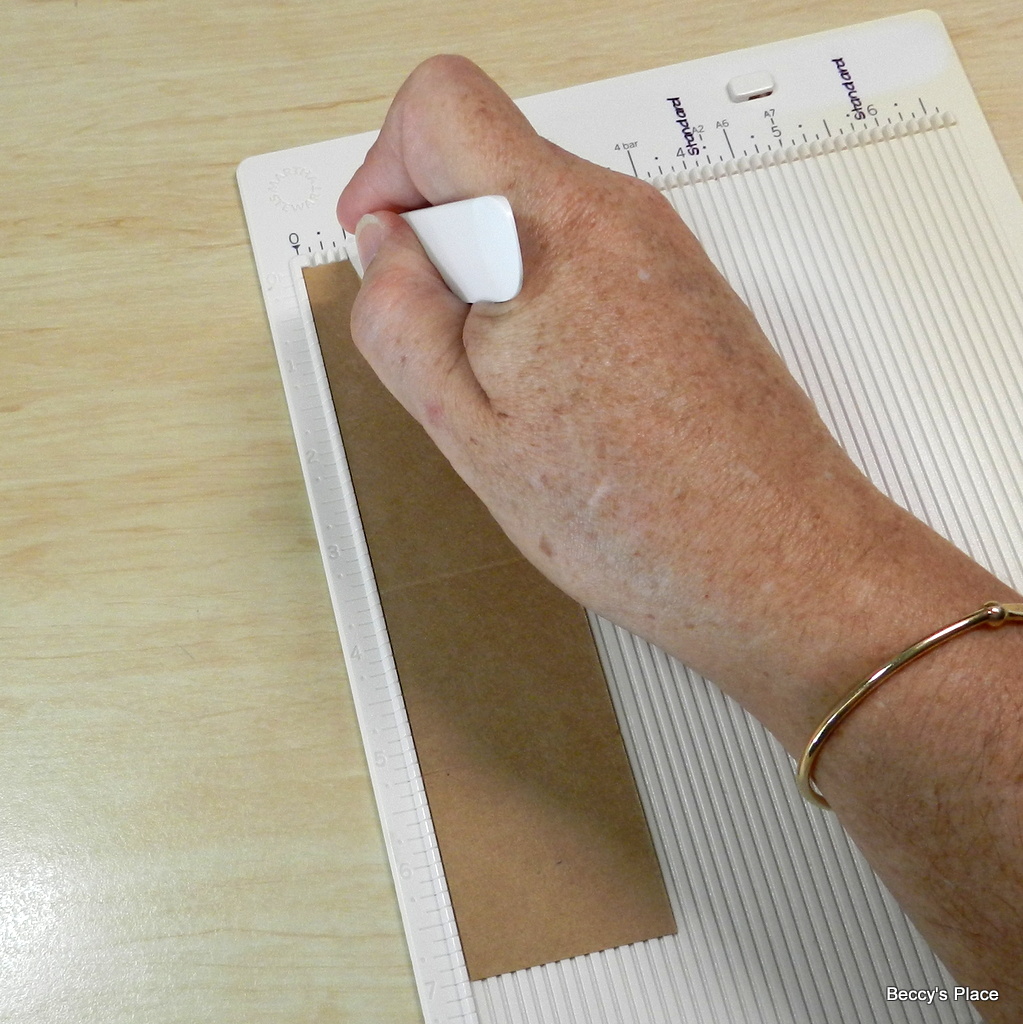
2. Trim a piece of cardstock to 7" x 13/4" for the main box piece. I've used kraft cardstock to simulate an actual packing carton, but you can use whatever cardstock suits your project. Trim a second piece of the same cardstock to 3" x 3/4" to hold your image.
3. Place the larger piece of cardstock horizontally on your score board and score at 13/4", 31/2" and 51/4". Turn it 90 degrees and score again at 1/2".
4. Now place the small piece of cardstock horizontally on your score board and score at 3/4", 11/2" and 21/4". Fold along all the score lines, pressing firmly.
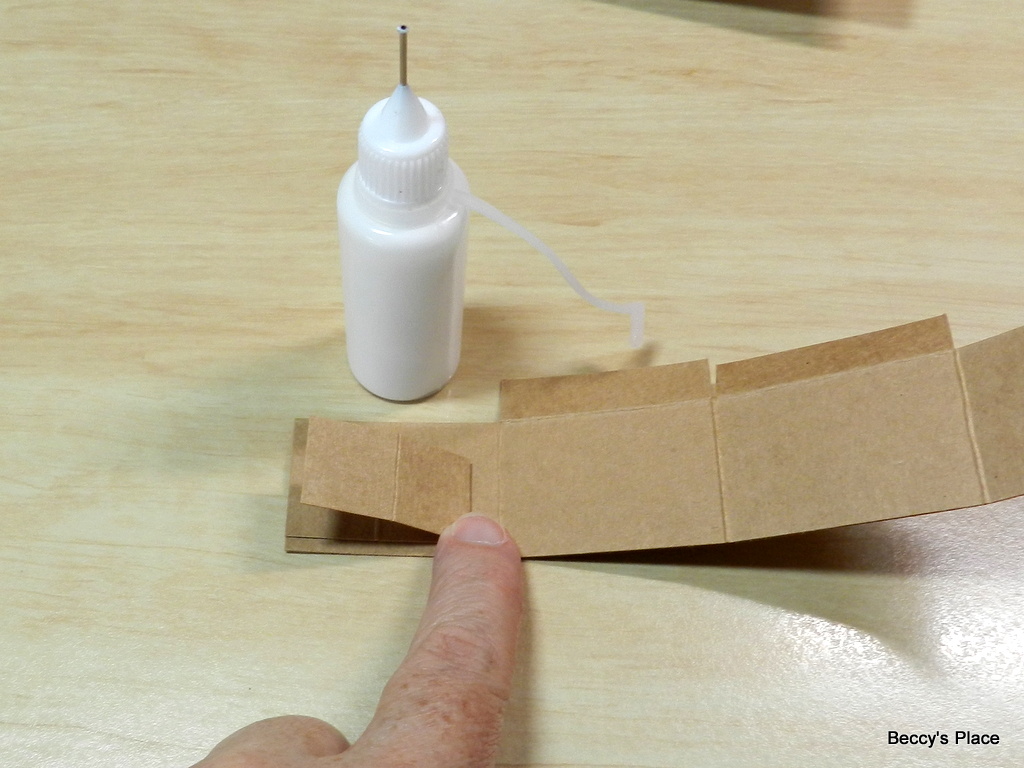
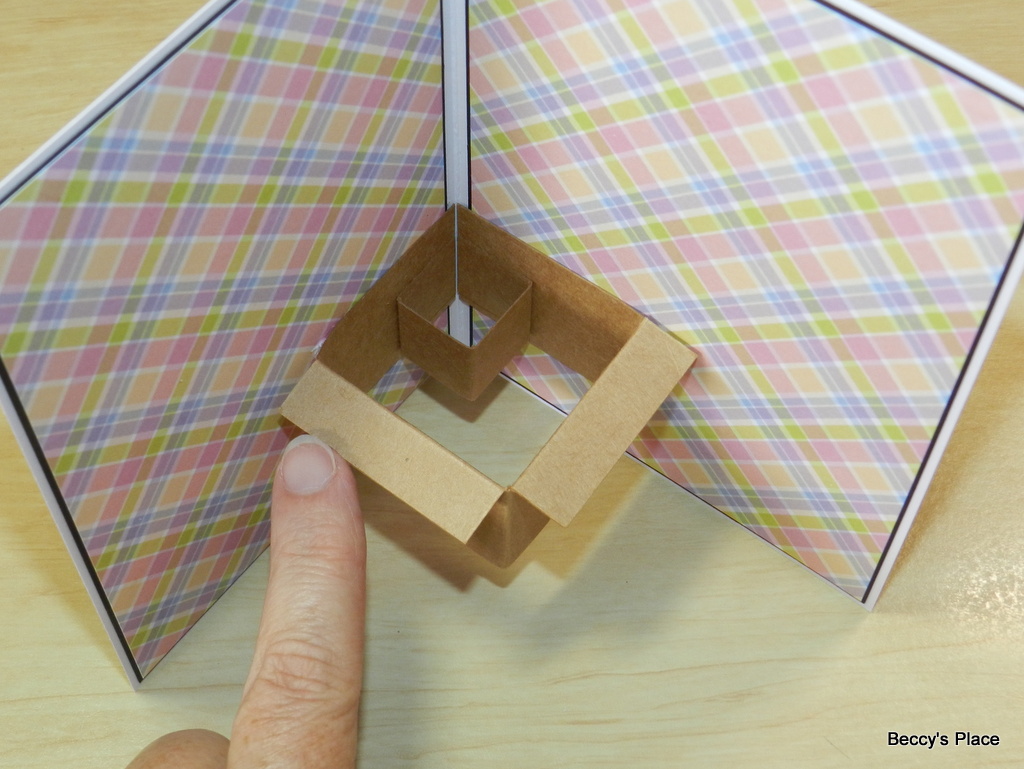
5. Use a small pair of scissors to trim away the two, outer top panels of the bigger piece of cardstock. See the photo below and the template above for clarification.
6. Apply glue to one end of the small piece of cardstock and secure it to the end of the large piece of cardstock, making sure the edges are flush. I placed mine a little more toward the bottom, but you can centre it if you wish.
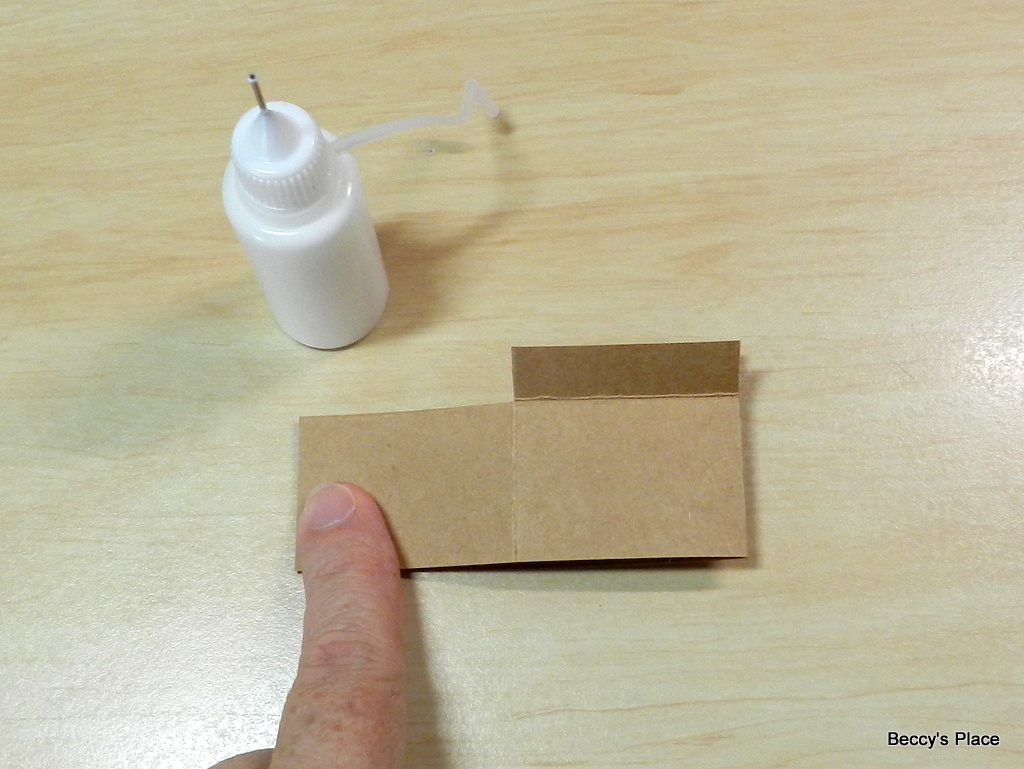
7. Fold the small piece of cardstock over and apply glue to the end panel.
8. Fold the large piece of cardstock over and press it into the glue.
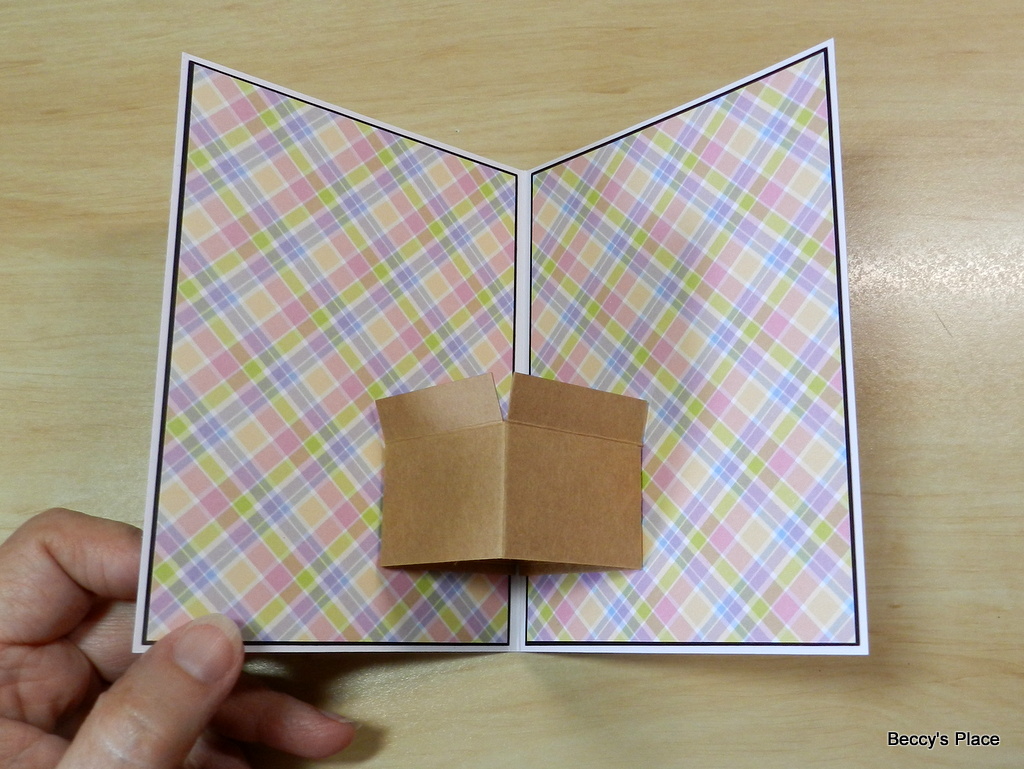
9. Hold the cardstock so the open sides are to the right, and apply glue to the last panel. Secure the cardstock to the right hand side of the centre of your card, positioning the edges just to the right of the fold line. I placed mine toward the bottom of the card, but you can position it however you desire.
10. Apply glue to the left-hand side of the cardstock and close the card. Leave it for a few minutes to allow the glue to dry.
11. It was at this point that I noticed the corners of the box scrape along the paper when the card is being opened and closed, so I simply clipped away the corners with a small pair of scissors. You will need to do this to allow a smooth action for your card. (NOTE: The cut corners are included in the template diagram)
12. Secure your image to the small box on the inside using glue or tape. Position the image so that it peeks over the edge, then decorate the box as desired.
Products: